Hello guys in this post I will show you how to initializing Isilon Gen 6 nodes.
Steps:
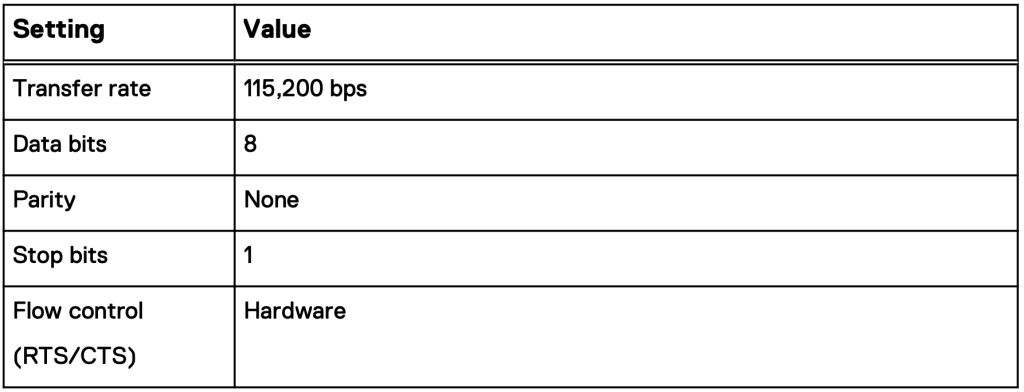
- Connect to the first node via a serial connection with the following configuration.
![](https://otheritblog.wordpress.com/wp-content/uploads/2020/04/image.png?w=1024)
- Then type the number 1 and hit enter to create a new cluster.
![](https://otheritblog.wordpress.com/wp-content/uploads/2020/04/screen-shot-2020-04-01-at-20.42.00.png?w=1024)
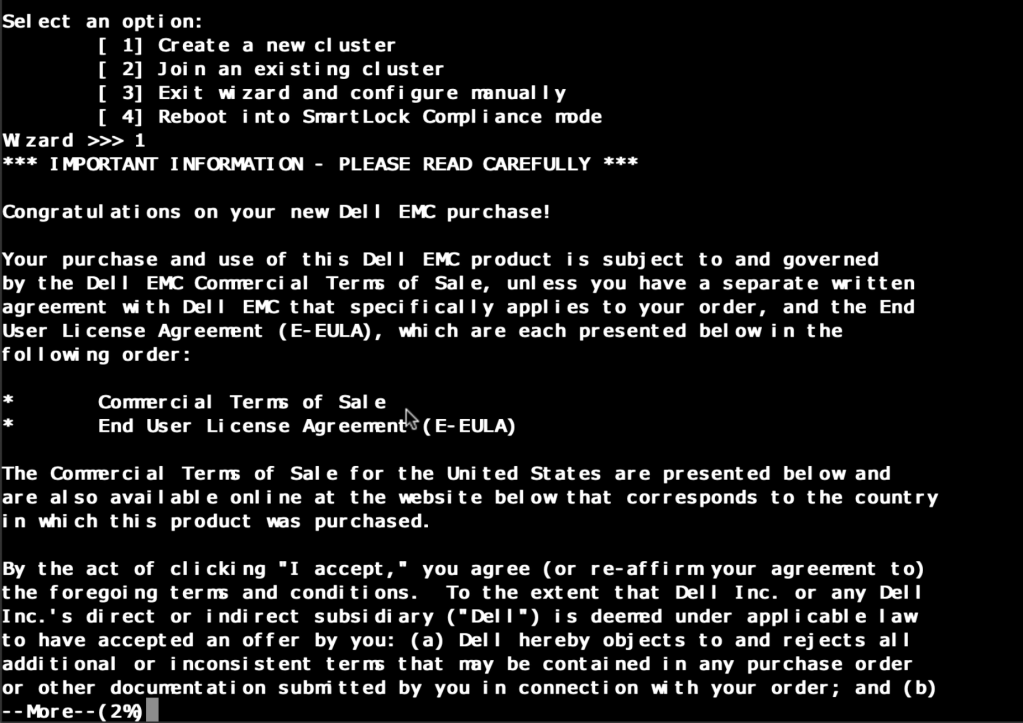
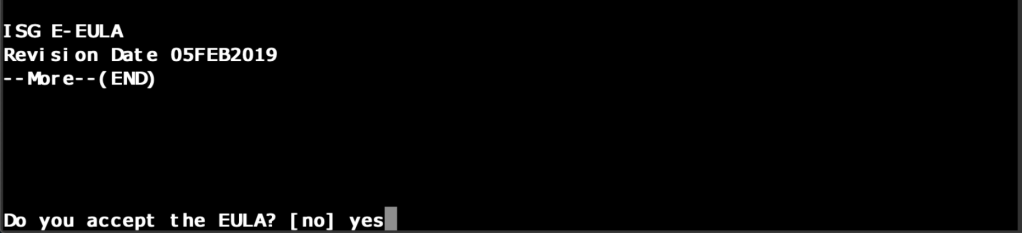
- Press space bar until the finish of the EULA, type yes and hit enter.
![](https://otheritblog.wordpress.com/wp-content/uploads/2020/04/screen-shot-2020-04-01-at-20.42.39-1.png?w=1024)
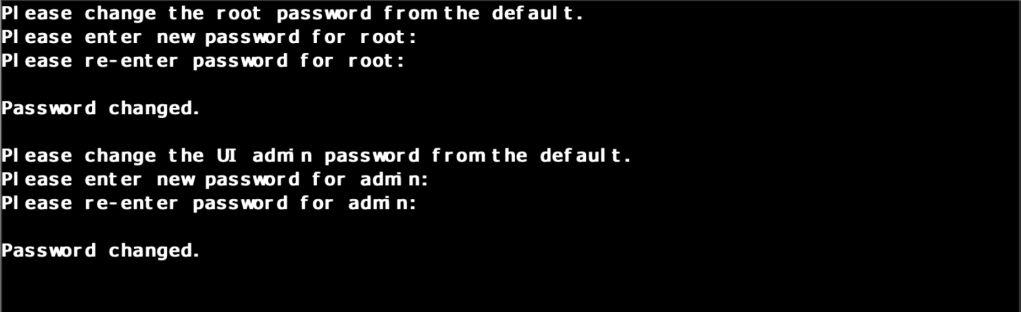
- Type the password for the root account twice, and for the administrator account twice.
![](https://otheritblog.wordpress.com/wp-content/uploads/2020/04/image-1.png?w=1024)
- Type the name for the cluster and hit enter.
![](https://otheritblog.wordpress.com/wp-content/uploads/2020/04/image-2.png?w=1024)
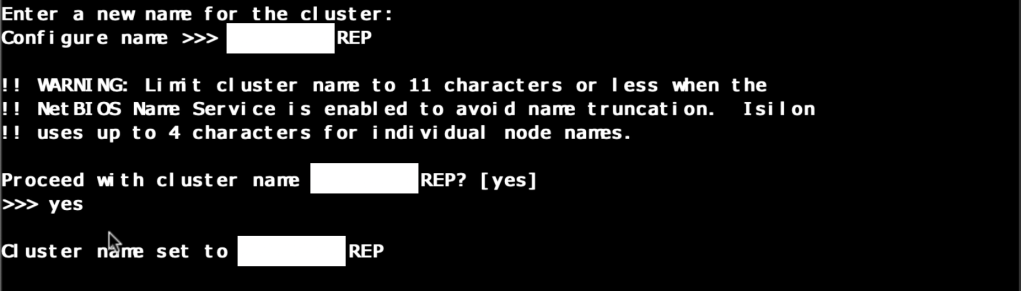
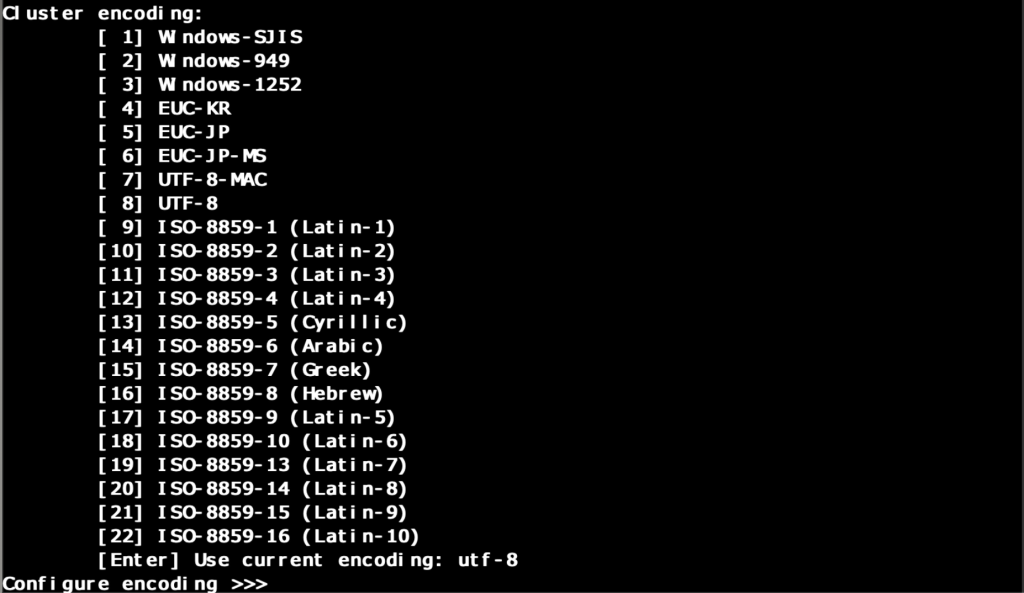
- Choose the encoding for the cluster or hit enter for the default “utf-8”.
![](https://otheritblog.wordpress.com/wp-content/uploads/2020/04/image-3.png?w=1024)
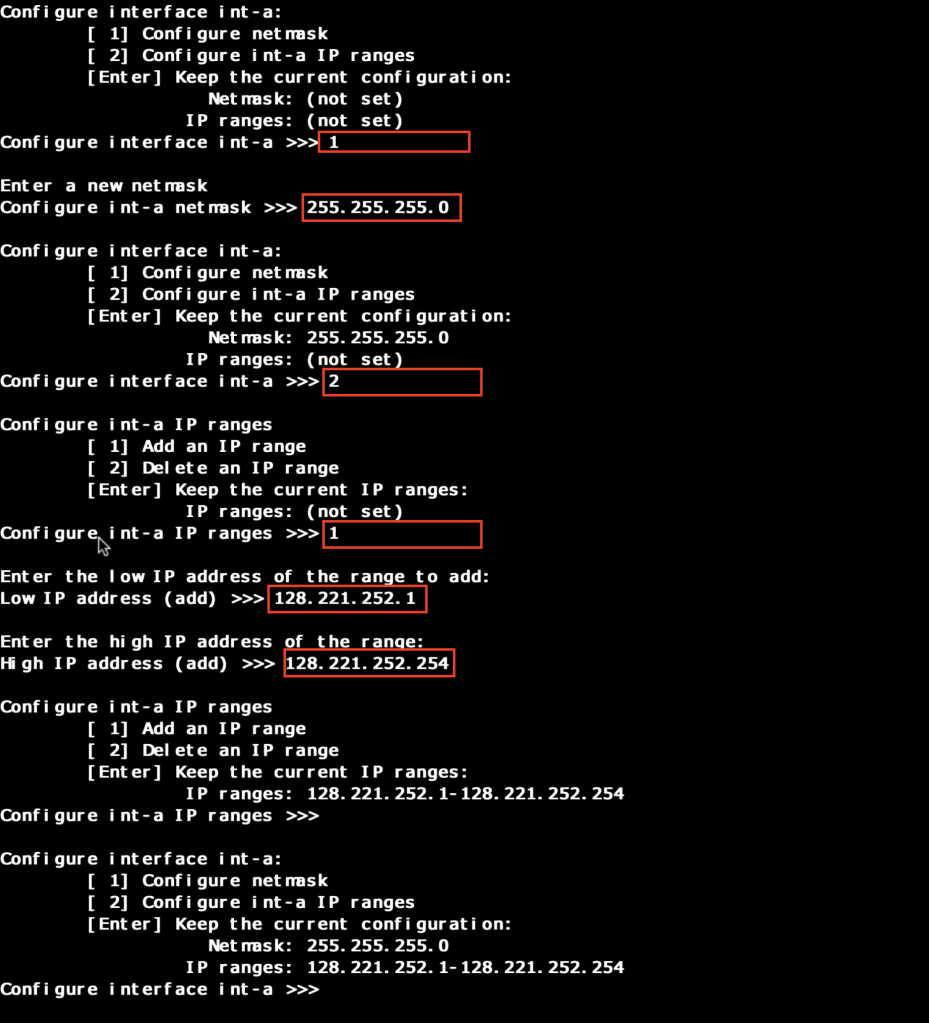
- Configure the internal network “a” like the following example.
![](https://otheritblog.wordpress.com/wp-content/uploads/2020/04/image-4.png?w=930)
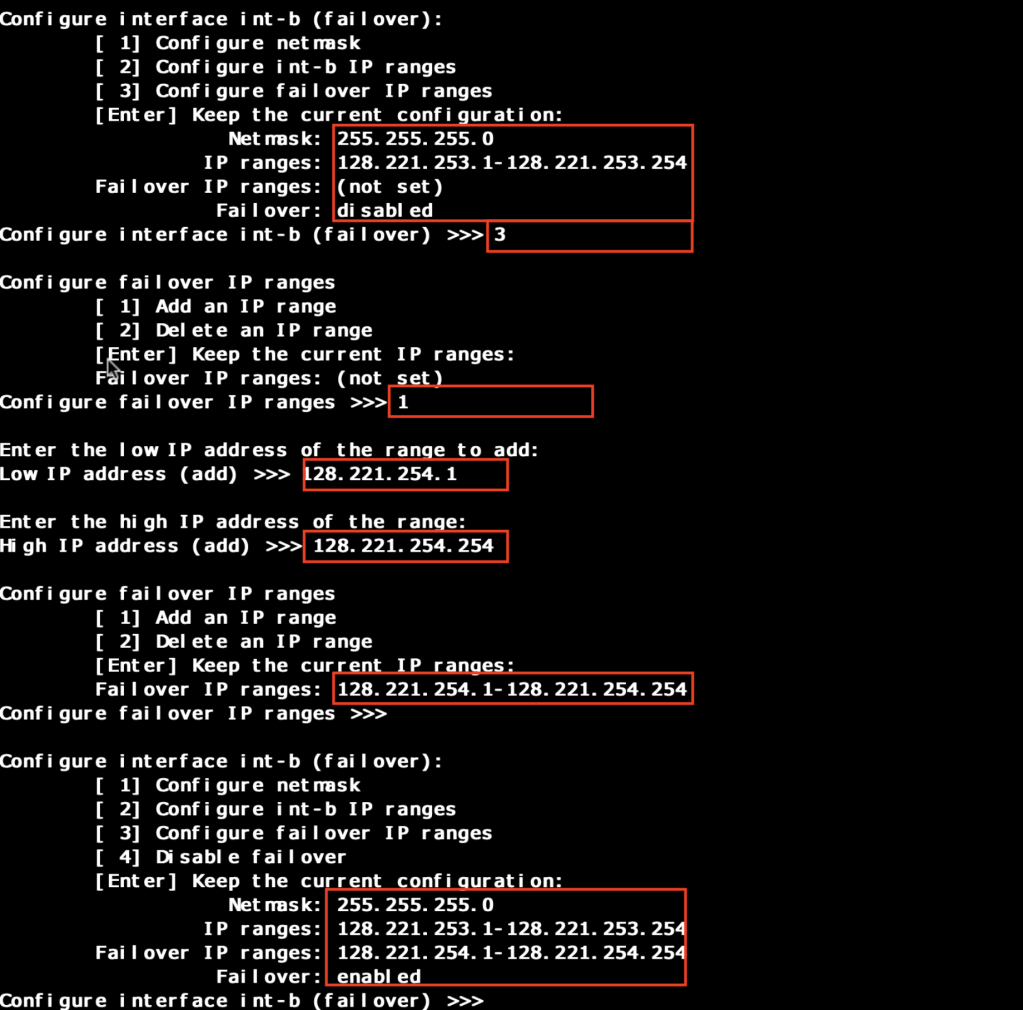
- Configure the internal network “b” like the following example.
![](https://otheritblog.wordpress.com/wp-content/uploads/2020/04/image-19.png?w=1017)
![](https://otheritblog.wordpress.com/wp-content/uploads/2020/04/image-20.png?w=1024)
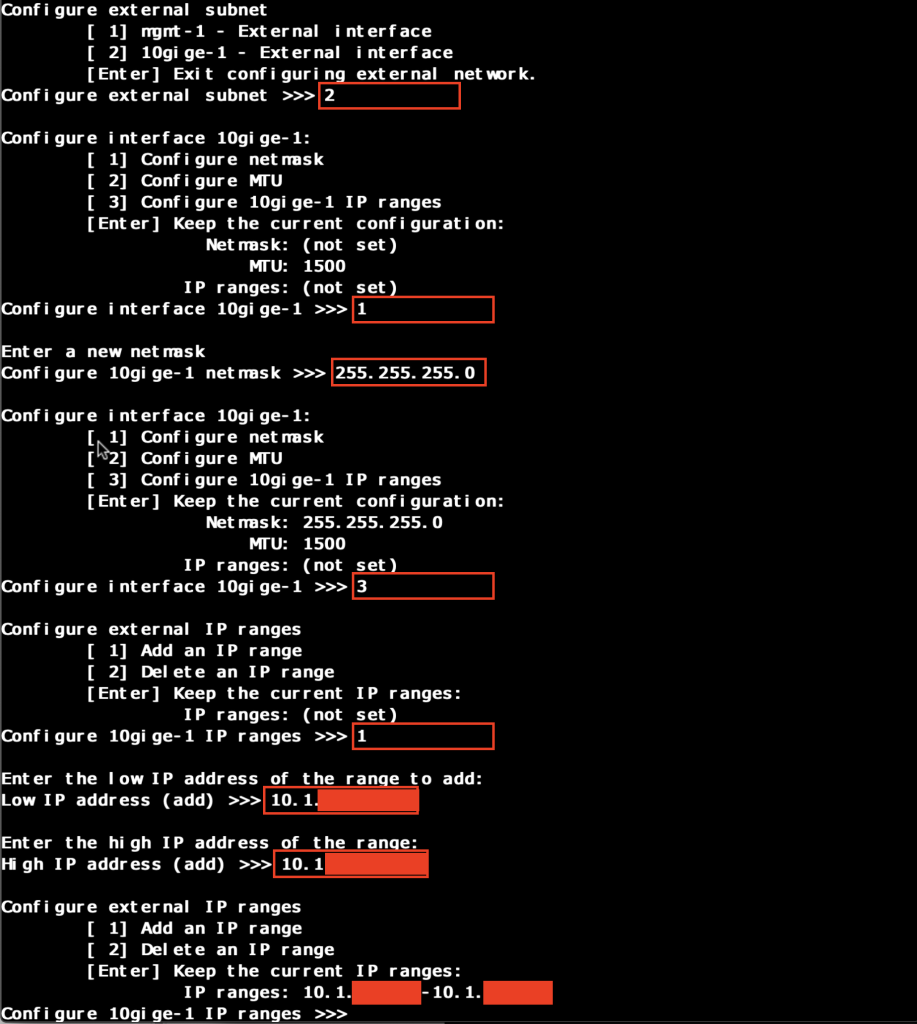
- Configure the external network like the following example.
![](https://otheritblog.wordpress.com/wp-content/uploads/2020/04/image-5.png?w=917)
![](https://otheritblog.wordpress.com/wp-content/uploads/2020/04/image-6.png?w=1024)
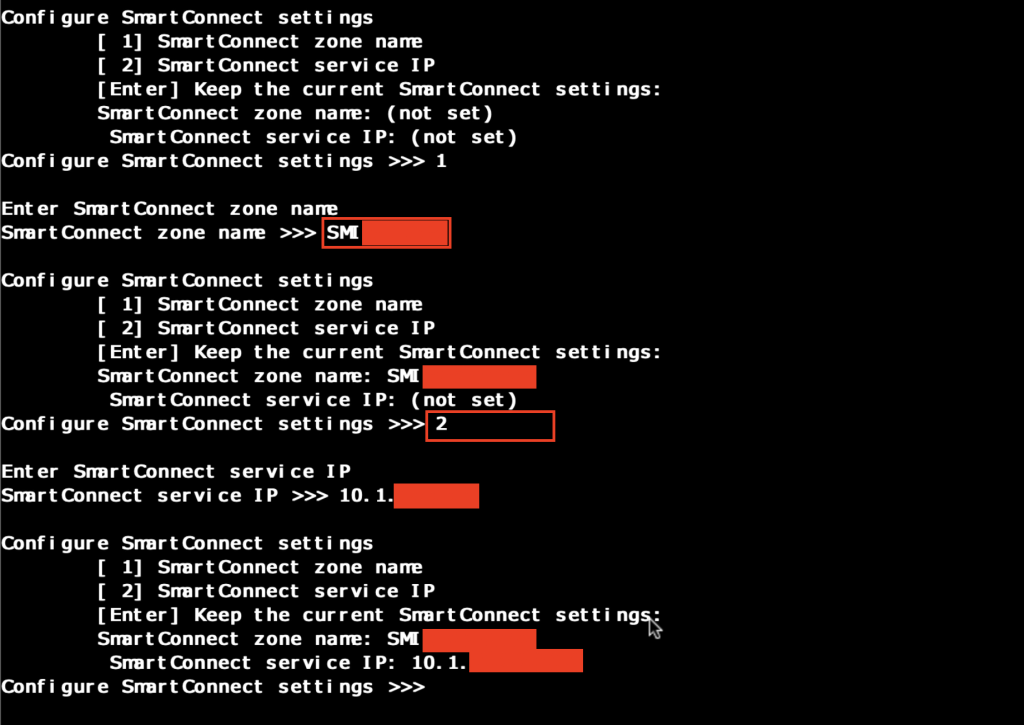
- Configure smartconnect.
![](https://otheritblog.wordpress.com/wp-content/uploads/2020/04/image-7.png?w=1024)
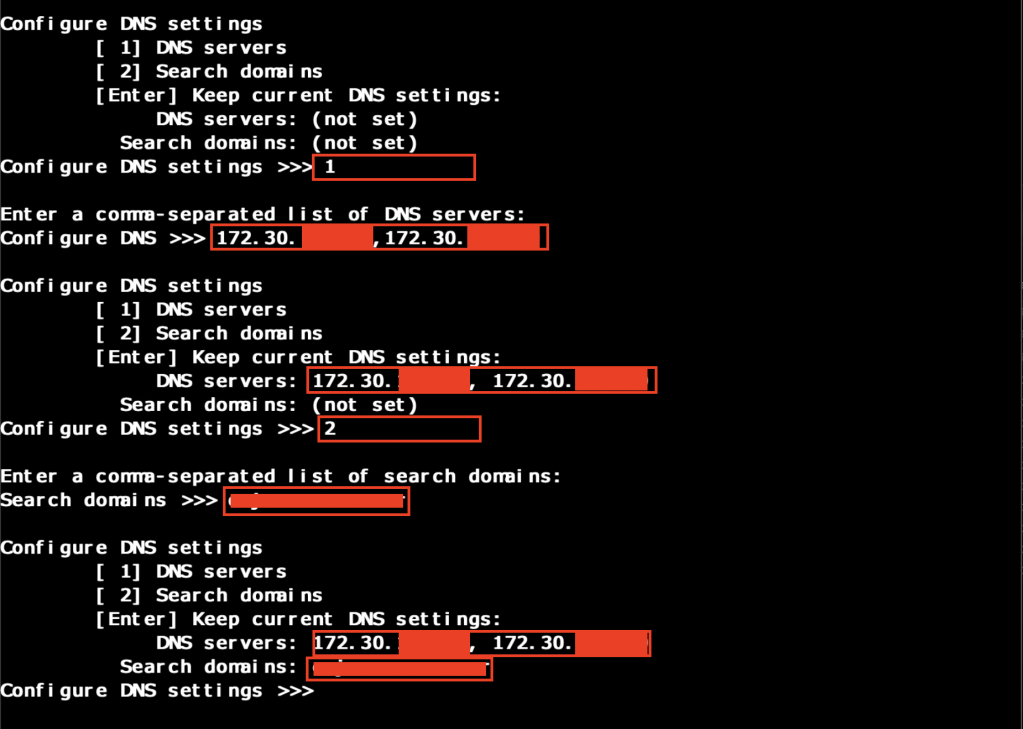
- Configure DNS settings.
![](https://otheritblog.wordpress.com/wp-content/uploads/2020/04/image-8.png?w=1024)
- Configure the cluster date and time.
![](https://otheritblog.wordpress.com/wp-content/uploads/2020/04/image-9.png?w=1024)
- Configure the cluster join mode.
![](https://otheritblog.wordpress.com/wp-content/uploads/2020/04/image-11.png?w=1024)
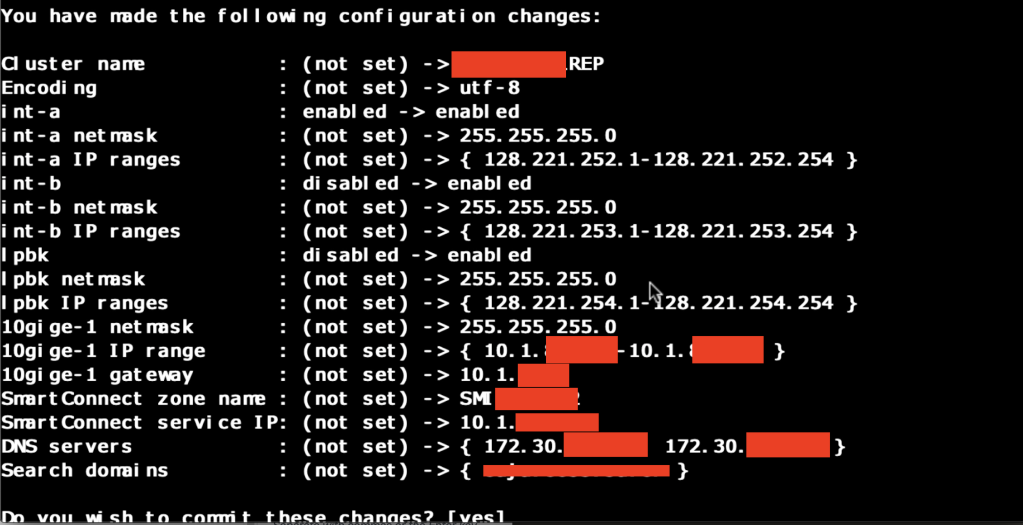
- Review the configuration before commit.
![](https://otheritblog.wordpress.com/wp-content/uploads/2020/04/image-12.png?w=1024)
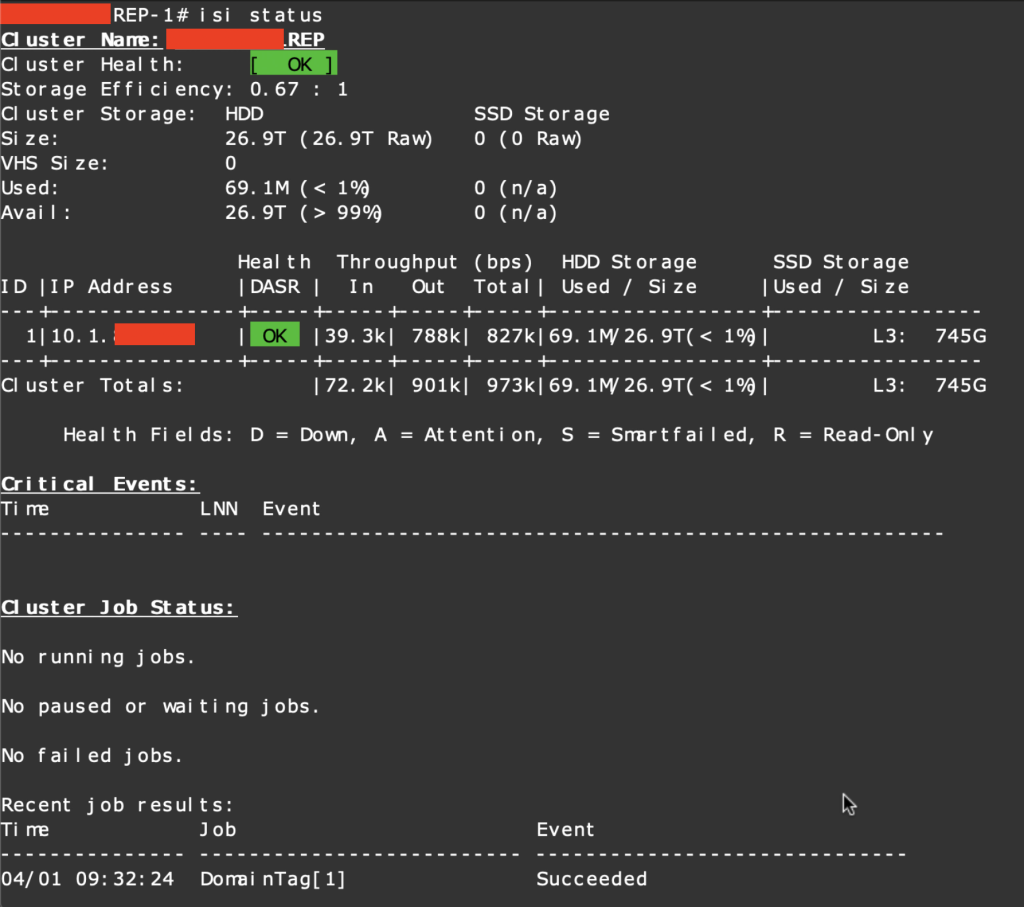
- Verify the status of the first node.
![](https://otheritblog.wordpress.com/wp-content/uploads/2020/04/image-13.png?w=1024)
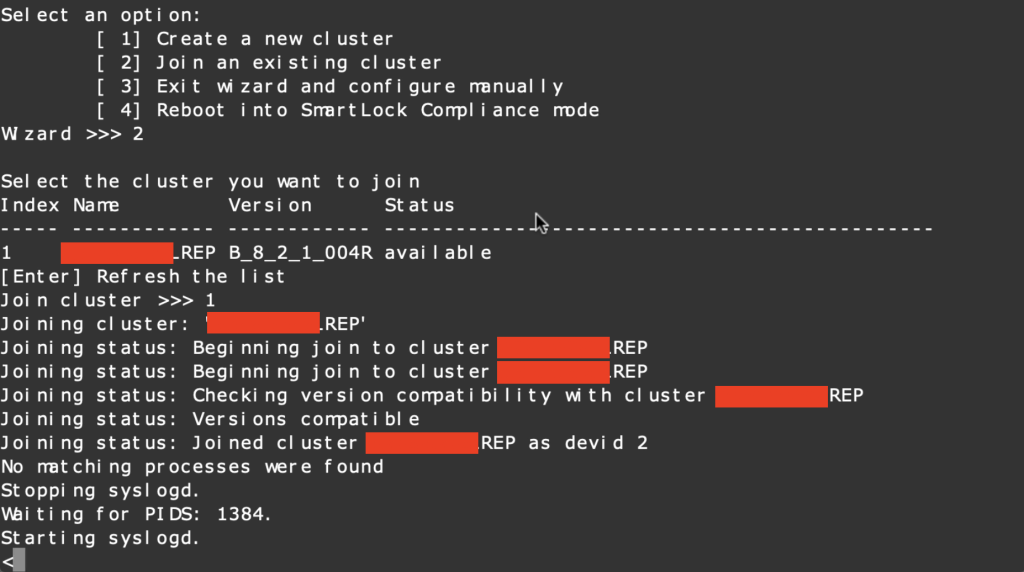
- Add the rest of the nodes one by one.
![](https://otheritblog.wordpress.com/wp-content/uploads/2020/04/image-14.png?w=1024)
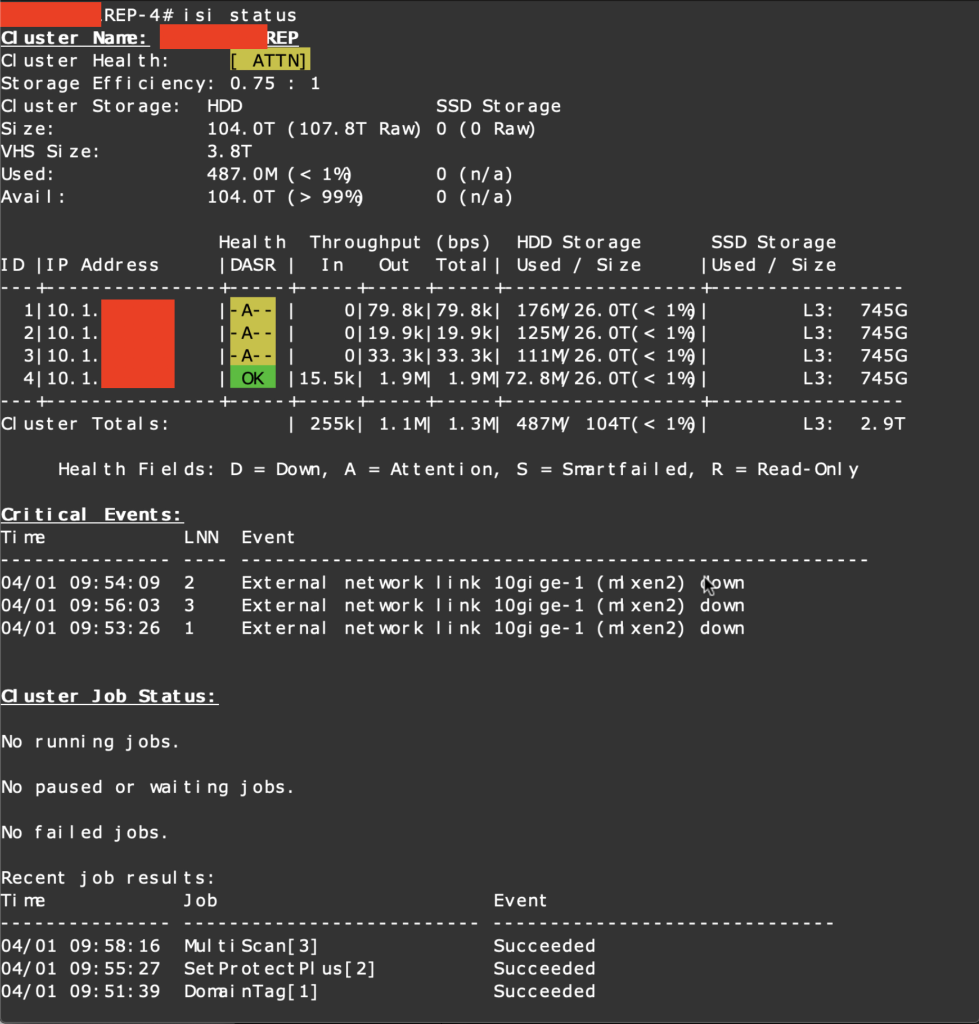
- Verify the status of the cluster.
![](https://otheritblog.wordpress.com/wp-content/uploads/2020/04/image-15.png?w=979)
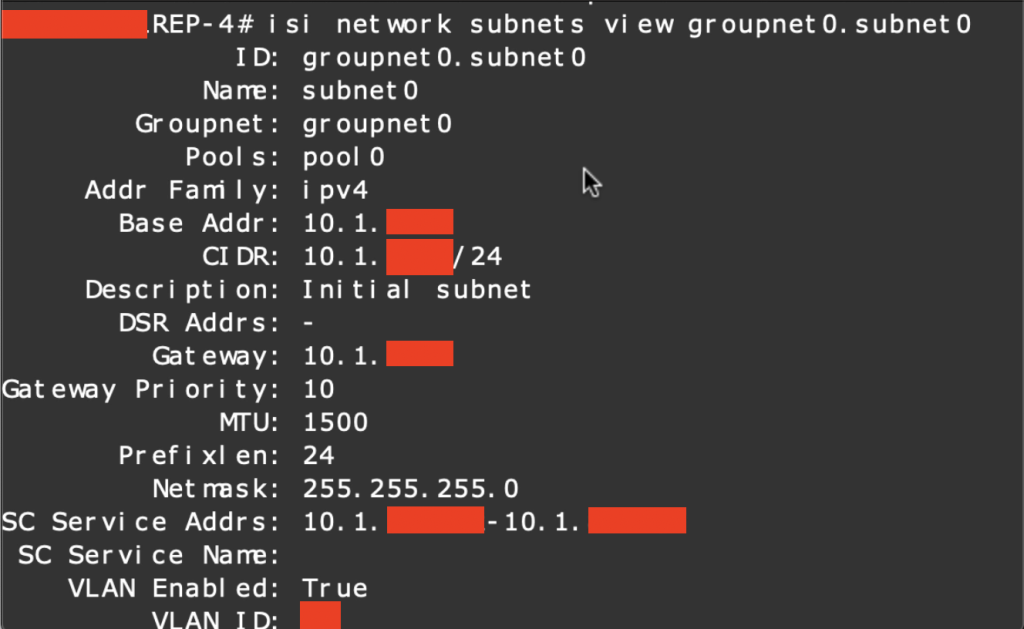
- Modify the vlan-id of the initial subnet via CLI if you need to.
isi netwok subnets modify groupnet0.subnet0 --vlan-enable=yes --vlan-id X
- Verify the subnet with the new vlan-id.
![](https://otheritblog.wordpress.com/wp-content/uploads/2020/04/image-16.png?w=1024)
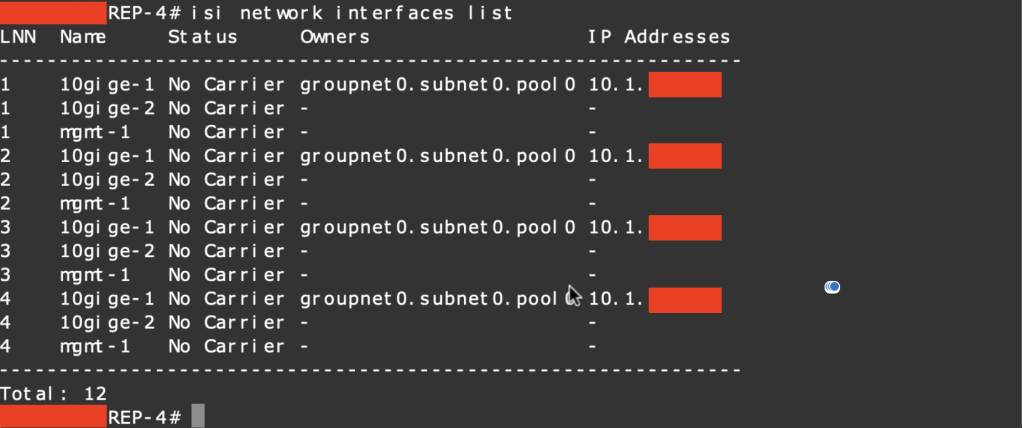
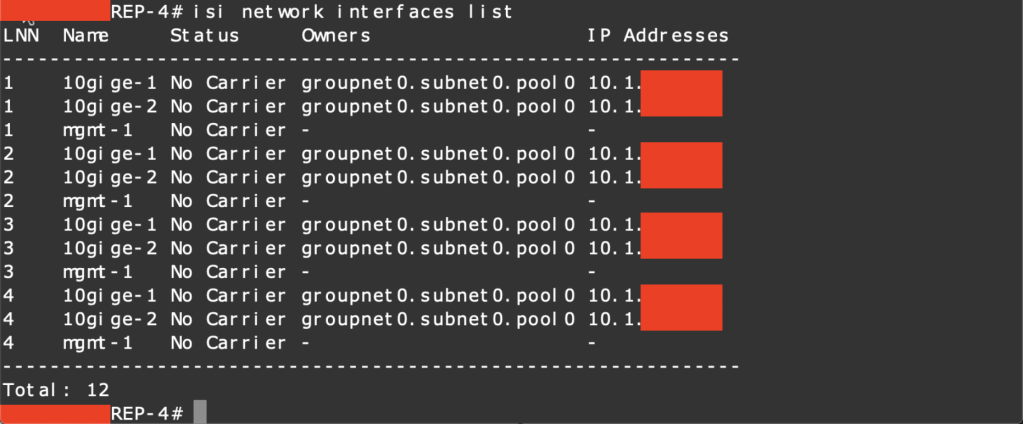
- Add unused interfaces to the initial pool with the following command, if you need to.
isi netwok pools modify groupnet0.subnet0.pool0 --add-ifaces=1-4:10gige-2
- Verify the interface list.
![](https://otheritblog.wordpress.com/wp-content/uploads/2020/04/image-17.png?w=1024)
![](https://otheritblog.wordpress.com/wp-content/uploads/2020/04/image-18.png?w=1024)
And we finish, verify the connectivity of the cluster via web browser. Type the IP address from the node pool like: https:<ip_node_pool>:8080.
Error while joining the node to the cluster, visit this post.
Add some configurations via GUI with the MGMT-1 (UTP) interface prior connecting to the external network, visit this post.